Protein Buns
Chewy and delicious Protein Buns are made from vital wheat gluten making them incredibly high protein, low carb, low fat, and vegan! These protein dinner rolls are super easy and quick to make in about 45 minutes from start to finish and are great for meal prep.

This post may contain affiliate links which means we earn a tiny commission when you use our links. This does not increase the price you pay for what you purchase but the pennies we earn from it help support our site and help us provide more free recipes for you. See our disclosure policy for details.
I love quick and easy lunches, but I love them even more when they can be meal prepped. These protein buns are super quick to make and the recipe makes 10 seitan rolls that can be refrigerated and reheated each day for easy meals and/or snacks.
I’m not going to sit here and tell you that one protein roll is a full meal. But it does have over 30 grams of protein so it can definitely be a decent part of your meal! Pair it with a salad like my Kale Salad with Blueberries and Grapes or Healthy Plant Based Broccoli Salad. Or enjoy it with a soup like my Cabbage Mushroom Soup or Potato and Cauliflower soup for a healthy dose of veggies with your protein.
As I mentioned in my Veggie Loaded Tempeh Chili post, my partner and I have been doing a lot of weight training lately so we’ve increased our protein to boost our muscle repair and development. These protein buns are something I love to eat after coming home from a hard training session.
Oh, and I’m neglecting the most amazing part of this protein roll recipe: it’s absolutely DELICIOUS! These are some of the best rolls I’ve had in my life, and I’m a big fan of bread.
Are they AS soft and AS fluffy as regular white flour rolls? No. That’s partially due to the high protein flour called Vital Wheat Gluten. It’s also due to lack of fat in the recipe—there’s no butter or oil in our seitan bread recipe.
But I’ve added things like tofu and nutritional yeast that increase the fluffiness and improve the texture (not to mention taste, in the case of the nooch / nutritional yeast!). And honestly, these seitan rolls are crusty on the outside and soft and chewy on the inside. They’re very delicious and satisfying.
Disclaimer: This recipe was inspired by Mrs. Slim on Plants’ High Protein Seitan Buns recipe. I have seen this recipe elsewhere but I tried her recipe and enjoyed it. I made some modifications to the recipe, so I’m publishing it here, but it is heavily inspired by her recipe.

Ingredients
See the recipe card below for the full ingredients list (with amounts) and instructions.
- Silken Tofu: I blend this with a little soy milk as the wet ingredients for the recipe. It acts as a dough conditioner, making the protein buns way softer and more fluffy. It also adds more protein! The recipe calls for the silken tofu that comes in the refrigerator section in 14-ounce packages (I drain the excess water from the package). If you’re using the small boxes of shelf-stable silken tofu, you might need to use one whole box plus part of another to get the right amount.
- Unsweetened Soy Milk: I almost exclusively use soy milk in my kitchen and I only use the kind that comes in a shelf stable carton. This is because I can find organic non-GMO soy milk that’s literally made from just organic soybeans and water. I love to use this type of soy milk for sauces, my morning tea, and making my homemade soy yogurt.
- Vital Wheat Gluten: This is wheat flour with everything but the protein stripped away. It’s very high in protein and often used to make a meat alternative called seitan. Some people who follow a WFPB diet don’t use this product because it is somewhat processed. I use it and I’m fine with it, but if you choose to use something else, it will be an experiment, since I have not tried any other recipe.
- Non-Fortified Nutritional Yeast: This adds flavor and a little bit more protein to this recipe; it’s delicious! But I’ve experimented a lot with using vital wheat gluten i recipes and I find that nutritional yeast also really adds to the texture.
- Baking Powder: This is our leavening agent as this protein roll recipe is not a yeasted recipe.
- Spices: I use granulated onion and granulated garlic in this recipe to give the protein rolls some flavor. I also added dried chives into the mix because I love the flavor they add.
- Iodized Salt: Okay, now most of you who are familiar with me know I try to keep my sodium low. Based on some dialogue with my doctor and personal experimentation, I have added a small amount of salt back into my diet with great results. If you would prefer to use miso paste in this recipe you can do that (just add it to the blender with the silken tofu and soy milk).

Substitutions
- Silken Tofu: I have not tested this recipe with anything else, but I would think plain unsweetened vegan yogurt would work just fine. Blended white beans could work as well. We basically just want to mix the dry ingredients with a thick and creamy wet mixture to create an enriched dough.
- Unsweetened Soy Milk: You can use any plant-based milk you have on hand. Keep in mind that non-dairy milks in the refrigerated section of the grocery store tend to have a higher water content so it might slightly reduce the fluffiness but it should still work fine.
- Vital Wheat Gluten: I’m sure you could use regular all purpose flour, bread flour, whole wheat flour, or a good 1:1 gluten-free flour baking blend in this recipe, but I just want to warn you that I have not tested any substitutions so anything you substitute will be an experiment. That being said, it’s a pretty easy recipe to make, so feel free to experiment if you feel comfortable! Also keep in mind, the reason this recipe is so high in protein is from the vital wheat gluten, so any substitution will drastically lower the protein content.
- Nutritional Yeast: I don’t recommend leaving this out, but if you can’t have it, add an additional 20 grams of vital wheat gluten.
- Baking Powder: You could definitely experiment with making a yeasted bun recipe this way but I don’t know how the vital wheat gluten would affect the rise. And if you wanted to use baking soda instead of baking powder, you would need to add at least a tablespoon of an acidic liquid like apple cider vinegar to the recipe to activate the baking soda (and again, I haven’t tested it).
- Spices: Feel free to choose different seasonings or add to these seitan buns. Other dried herbs would be nice too.
- Salt: Feel free to use miso paste if that suits your needs better, or an alternative like a potassium chloride salt substitute or Benson’s Table Tasty.

How to Make Protein Buns
Watch me make this recipe or follow the step-by-step instructions below.
- Note About Measuring Flours in Baking: I highly recommend using a food scale to weigh your dry ingredients (especially the flour). When we dig our measuring cup into a bag of flour, we could be packing in much more flour than the recipe calls for. The only other method that is decently accurate is the spoon and level method, where you spoon the flour from the bag into your measuring cup (over a bowl, preferably) and level it off with the flat side of a butter knife. However, nothing is as accurate (and will produce as good and dependable results) as weighing your dry ingredients and food scales are an inexpensive and indispensable must-have gadget for any kitchen.
- Prep: Preheat the oven to 350 degrees F (180 degrees C) and line a baking tray with parchment paper or a silicone baking mat.
- Blend Wet Ingredients: Add your silken tofu and soy milk to a blender and blend until smooth.
- Combine Dry Ingredients: Add vital wheat gluten, nutritional yeast, baking powder, spices, and any dried herbs you’re using to a large mixing bowl and whisk them together until just combined.
- Add Wet Ingredients: Use a spatula to create a well in the center of the dry ingredients and add the contents of the blender. You don’t need to go nuts scraping every last bit out. Mix until just combined (do not over-mix). If the dough seems too dry, you can mix in a tablespoon of water. If it’s too sticky, add a tablespoon of vital wheat gluten and mix until it’s no longer super sticky (the dough will be thick and slightly sticky to the touch, though).
- Optional Step: If you’d like each protein bun to be the same size (and therefore the same calories and macros), you can weigh the dough. Place a plate on your food scale and zero out the scale. Add all the dough to the plate. Divide that number by 10 to get the approximate weight for each roll. Zero the scale out again and take a ball of dough from the plate until the scale says -(whatever the number is). When you get to that number, you can zero it out again and repeat the process until you have 10 balls of dough that are equal, then proceed with step 7.
- Divide Dough: If you did not want to do Step 5 (that’s fine!), simply divide the dough into 10 relatively equal pieces. Note that this recipe makes rolls that are about the size of the palm of an adult hand. If you prefer rolls bagels (keep in mind the calories and macros will increase), you can divide the recipe into 8 relatively equal pieces.
- Make Buns: The dough can be quite sticky so if you’d like, you can lightly spray your hands with cooking spray OR if you’re avoiding oil vehemently, you can lightly dust your hands with more flour and that should reduce the stickiness. When you’ve divided up your dough, roll each ball into a sphere shape with your palms and place on your lined baking tray at least 2 inches apart. If your rolls are connected after baking (mine usually are), you can separate them easily after taking them out of the oven. If you don’t want this to happen (like if you want the rolls to be perfectly round), you can place them further apart on two lined baking trays. I would recommend swapping the trays in your oven about halfway through the baking process to ensure even baking.
- Bake: Bake for 25-30 minutes on the center rack until the protein rolls are lightly golden brown and slightly firm to the touch (30 minutes was perfect for my oven). Don’t over bake them; check the bottoms with a spatula. They will have a medium brown shading to the underside of them when they’re done.
- Cool: Let them cool at least 10 minutes before ripping into one (challenging, I know), and let cool fully to room temperature before storing.
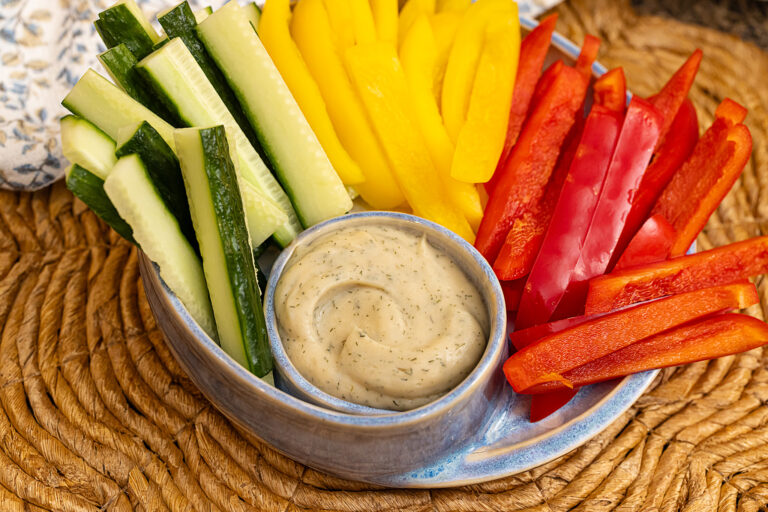
- For Serving: I like to slice any bread with a serrated knife for best results (after toasting). Serve with my Tofu Cream Cheese and tomato or the topping of your choice. Or serve as is because honestly they’re quite good on their own when they’re warm!
- For Storing and Reheating: Store cooled protein buns in an airtight container in the refrigerator for up to 6 days (there are no preservatives; I wouldn’t chance storing these unrefrigerated. Also for me personally they’ve lasted up to 10 days). When reheating, I like to place these seitan buns whole in the toaster oven or air fryer and reheat to get the crispy crust and warm soft inside texture.

Serving Suggestions
These protein rolls go well with anything (and are honestly great as a high protein vegan snack as well), but here’s a few of the many ways you could enjoy them:
With soup or salad:
- Cabbage Mushroom Soup
- Kale Salad with Blueberries and Grapes
- Healthy Plant Based Broccoli Salad
- Potato and Cauliflower Soup
- Kale Sweet Potato Salad
- Veggie Loaded Tempeh Chili
Sliced in half with a spread or topping:
- Tofu Cream Cheese
- Classic Creamy Hummus
- Edamame Guacamole
- Butter Bean Hummus
- Healthy Chickpea Tuna Salad
- Beet Hummus
- Tofu Egg Salad
- Spinach Artichoke Hummus
- Butter Bean Scramble
- Pizza Hummus

More Plant Based Recipes to Try
- Portobello Pizzas
- Plant Based Burrito Bowl
- Oil-Free Pasta Salad
- Bell Pepper Nachos
- Golden Beet Beans and Greens
- Creamy Mushroom Stroganoff
- Whole Food Plant Based Potato Salad
- Pizza Flavored Savory Oatmeal

Protein Buns
Equipment
Ingredients
- 14 Ounces Silken Tofu, See notes below the instructions
- 1/2 Cup (4 Ounces) Unsweetened Soy Milk, or any plain unsweetened plant based milk
- 328 Grams Approx. just under 2 cups Vital Wheat Gluten, See notes below the instructions
- 25 Grams (1/4 Cup) Nutritional yeast, See note below the instructions
- 1 Teaspoon Baking Powder
- 1 Teaspoon Granulated Onion
- 1 Teaspoon Granulated Garlic
- 1/2 – 1 Teaspoon Iodized Salt, to taste, See notes below the instructions to replace
- 1 Tablespoon Dried Chives, optional
Instructions
- Note About Measuring Flours in Baking: I highly recommend using a food scale to weigh your dry ingredients (especially the flour). When we dig our measuring cup into a bag of flour, we could be packing in much more flour than the recipe calls for. The only other method that is decently accurate is the spoon and level method, where you spoon the flour from the bag into your measuring cup (over a bowl, preferably) and level it off with the flat side of a butter knife. However, nothing is as accurate (and will produce as good and dependable results) as weighing your dry ingredients and food scales are an inexpensive and indispensable must-have gadget for any kitchen.
- Prep: Preheat the oven to 350 degrees F (180 degrees C) and line a baking tray with parchment paper or a silicone baking mat.
- Blend Wet Ingredients: Add your silken tofu and soy milk to a blender and blend until smooth.
- Combine Dry Ingredients: Add vital wheat gluten, nutritional yeast, baking powder, spices, and any dried herbs you're using to a large mixing bowl and whisk them together until just combined.
- Add Wet Ingredients: Use a spatula to create a well in the center of the dry ingredients and add the contents of the blender. You don't need to go nuts scraping every last bit out. Mix until just combined (do not over-mix). If the dough seems too dry, you can mix in a tablespoon of water. If it's too sticky, add a tablespoon of vital wheat gluten and mix until it's no longer super sticky (the dough will be thick and slightly sticky to the touch, though).
- Optional Step: If you'd like each protein bun to be the same size (and therefore the same calories and macros), you can weigh the dough. Place a plate on your food scale and zero out the scale. Add all the dough to the plate. Divide that number by 10 to get the approximate weight for each roll. Zero the scale out again and take a ball of dough from the plate until the scale says -(whatever the number is). When you get to that number, you can zero it out again and repeat the process until you have 10 balls of dough that are equal, then proceed with step 7.
- Divide Dough: If you did not want to do Step 5 (that's fine!), simply divide the dough into 10 relatively equal pieces. Note that this recipe makes rolls that are about the size of the palm of an adult hand. If you prefer rolls bagels (keep in mind the calories and macros will increase), you can divide the recipe into 8 relatively equal pieces.
- Make Buns: The dough can be quite sticky so if you'd like, you can lightly spray your hands with cooking spray OR if you're avoiding oil vehemently, you can lightly dust your hands with more flour and that should reduce the stickiness. When you've divided up your dough, roll each ball into a sphere shape with your palms and place on your lined baking tray at least 2 inches apart. If your rolls are connected after baking (mine usually are), you can separate them easily after taking them out of the oven. If you don't want this to happen (like if you want the rolls to be perfectly round), you can place them further apart on two lined baking trays. I would recommend swapping the trays in your oven about halfway through the baking process to ensure even baking.
- Bake: Bake for 25-30 minutes on the center rack until the protein buns are lightly golden brown and slightly firm to the touch (30 minutes was perfect for my oven). Don't over bake them; check the bottoms with a spatula. They will have a medium brown shading to the underside of them when they're done.
- Cool: Let them cool at least 10 minutes before ripping into one (challenging, I know), and let cool fully to room temperature before storing.
- For Serving: I like to slice any bread with a serrated knife for best results (after toasting). Serve with my Tofu Cream Cheese and tomato or the topping of your choice. Or serve as is because honestly they're quite good on their own when they're warm!
- For Storing and Reheating: Store cooled protein rolls in an airtight container in the refrigerator for up to 6 days (there are no preservatives; I wouldn't chance storing these unrefrigerated. Also for me personally they've lasted up to 10 days). When reheating, I like to place these seitan buns whole in the toaster oven or air fryer and reheat to get the crispy crust and warm soft inside texture.
Video
Notes
- Silken Tofu: I blend this with a little soy milk as the wet ingredients for the recipe. It acts as a dough conditioner, making the protein buns way softer and more fluffy. It also adds more protein! The recipe calls for the silken tofu that comes in the refrigerator section in 14-ounce packages (I drain the excess water from the package). If you’re using the small boxes of shelf-stable silken tofu, you might need to use one whole box plus part of another to get the right amount.
- Replacing the Silken Tofu: I have not tested this recipe with anything else, but I would think plain unsweetened vegan yogurt would work just fine. Blended white beans could work as well. We basically just want to mix the dry ingredients with a thick and creamy wet mixture to create an enriched dough.
- Unsweetened Soy Milk: You can use any plain unsweetened plant-based milk you have on hand. Keep in mind that non-dairy milks in the refrigerated section of the grocery store tend to have a higher water content so it might slightly reduce the fluffiness but it should still work fine. I almost exclusively use soy milk in my kitchen and I only use the kind that comes in a shelf stable carton. This is because I can find organic non-GMO soy milk that’s literally made from just organic soybeans and water.
- Vital Wheat Gluten: I’m sure you could use regular all purpose flour, bread flour, whole wheat flour, or a good 1:1 gluten-free flour baking blend in this recipe, but I just want to warn you that I have not tested any substitutions so anything you substitute will be an experiment. That being said, it’s a pretty easy recipe to make, so feel free to experiment if you feel comfortable! Also keep in mind, the reason this recipe is so high in protein is from the vital wheat gluten, so any substitution will drastically lower the protein content.
- Vital wheat gluten is wheat flour with everything but the protein stripped away. It’s very high in protein and often used to make a meat alternative called seitan. Some people who follow a WFPB diet don’t use this product because it is somewhat processed. I use it and I’m fine with it, but if you choose to use something else, it will be an experiment, since I have not tried any other recipe.
- Nutritional Yeast: I don’t recommend leaving this out, but if you can’t have it, add an additional 20 grams of vital wheat gluten.
- Spices: Feel free to choose different seasonings or add to these seitan buns. Other dried herbs would be nice too.
- Salt: Feel free to use miso paste if that suits your needs better (blend it with the tofu and soy milk), or an alternative like a potassium chloride salt substitute or Benson’s Table Tasty.